Showing posts with label recipes. Show all posts

Tasty Tuesday: steam-fried sausage and veggies

You know what's good? When you make a recipe that is easy and makes you feel like you're eating decently. I love striving for health when it comes to my food, but dang, I hate the preparation involved to get there. Enter the genius of throwing a bunch of stuff in your fridge into a skillet and steam-frying (totes legit cooking term) it all together until yumminess occurs. Well, B, the veggie hater, would say the sausage part was good, but he still ate the bowl I served him.
Steam-fried Sausage and Veggies
Ingredients:
  • 1 package Aidell's chicken apple sausages (or 5 links of your fave cooked chicken sausage), sliced
  • 1 medium zucchini, sliced and quartered
  • 1 small sweet potato, chopped into bite-sized pieces
  • 1 cup of cooked broccoli (mine was frozen, so I microwaved for two minutes and dumped it in semi-frozen)
Directions:
Slice, chop and assemble ingredients. Heat a large skillet to medium-high heat. Brown sausage and sweet potato, then add zucchini and broccoli. Cook thoroughly and serve. 

Easy, right? And tasty. I'm not paleo or anything, but I think this recipe would fit that diet pretty easily. 

Grandma Ople's apple pie

In 2010, when I was still blogging on a now defunct blog over at WordPress, I wrote a post about my favorite apple pie recipe.

A friend of mine, also named Adrienne (we spell it differently) loved the recipe so much she begged me to find it for her this year after a tech snafu that caused her to lose the link.

So, I figured I would add it to my current blog (even though I'm terrible about updating) so I could find it easier.

Enjoy!
***
A lot of women can ask their mom or grandma for a trusty pie recipe, however my grandma is not really known as a cook. She can get along all right in the kitchen, but she will be the first person to let you know she isn’t very good. Instead of asking my own grandma for her apple pie recipe (because she doesn’t have one) I looked to allrecipes.com for a yummy apple pie recipe. One of the first recipes I looked at was Grandma Ople’s apple pie. It looked easy enough and had delicious ingredients, so I decided to give it a try.
I followed the recipe very closely, only adding a little cinnamon, and using trader Joe’s frozen pie crust, even making the lattice top crust. The pie was amazing. I mean melt in your mouth, buttery perfection. I have never had an apple pie that delicious. The only bad thing was it wasn’t very pretty with the lumpy lattice top.
I made the pie again for a pre-Thanksgiving dinner party I was attending, and decided to use a full crust this time. It turned out even better this time around, and I got so many wonderfully sweet comments on how yummy it was! The other day, my friend Adrienne asked for apple pie recipes, and of course I had to offer her Grandma Ople’s recipe! I don’t know who Grandma Ople is, but I just want to hug and kiss her for creating this wonderful recipe! I am giving you the recipe with my own little additions and changes so you can try it for yourself!

Grandma Ople’s Apple Pie, a la Adrian
1 pkg Trader Joe’s frozen pie crust (includes 2)
6 large (8 small) Honeycrisp apples, peeled, cored and thinly sliced
1/2 cup unsalted butter
3 tbls flour
1/4 water
1/2 cup white sugar
1/2 cup packed brown sugar
1 tsp cinnamon
Directions:
1. Preheat oven to 425 degrees. Melt the butter in a saucepan. Stir in flour to form a paste. Add water, cinnamon, white sugar and brown sugar, and bring to a boil. Reduce temperature and let simmer for 5 minutes.
2. Place the bottom crust in your pan. Bake at 425 for 10 minutes, remove and let cool for a few minutes.
3. In a separate bowl, pour sugar and butter mixture over apples, saving just a little of the mix for the top crust. Toss to coat, then fill pie crust with apples, mounding slightly.
4. Cover with full crust and paint with leftover sugar mixture. Pinch both crusts together, making a pattern if you want all the way around the pie.
5. Bake 15 minutes in the preheated oven. Reduce the temperature to 350 degrees F. Continue baking for 35 to 45 minutes, until apples are soft.
Remove, let cool and enjoy!! Let me know if you use this pie recipe, I want to see if you make any adjustments and what you think!

Tasty Tuesday: almond butter yogurt bowl

Here's a delicious, filling, protein packed treat that pretty much anyone can enjoy. You can change ingredients to suit your tastes and needs, so feel free to make this your own. It's super easy to throw together when a sweets craving hits, or when you just want a healthy snack.
Happy Girl Yogurt Bowl
Ingredients
1/2 cup nonfat Greek Yogurt, I used plain Fage
1 tbsp almond or peanut butter
1 dash cinnamon
1 tsp agave syrup
1 banana
4 strawberries, sliced

Directions: Place yogurt, nut butter, cinnamon, and agave into a small bowl and mix together. Top with sliced bananas and strawberries. Enjoy the heck out of your delicious treat.

My bowl ended up being just over 300 calories, with 14 grams of protein and 7 grams of fiber. Not bad! You can use coconut or soy yogurt, any nut butter you like, and any fruit that sounds like a good addition. You can skip the agave, or use honey or stevia as your sweetener instead. Pumpkin pie spice would probably be a fantastic trade off for the cinnamon. It's an extremely versatile dish that can be changed so many ways, so feel free to experiment and find what works for you.

Tasty Tuesday: Peanut butter and banana oat cookies


Y'all know I am a total cookie monster. Doesn't matter if it's fresh out of the oven, or 5 days old, chocolate chip, or oatmeal, I love me some cookies. Even when I am satisfying my sweet tooth in a healthy way, I still want cookies. Or cupcakes, but that's a whole 'nother post. Basically, give me a baked good, and I'm a happy girl. I digress. Back to those healthy cookies.

I've been fighting a sweets craving something fierce lately while on this TIU bikini series, and while I applaud myself for my restraint, I am still dying for something sweet to take the edge off. Last week, I finally allowed myself to experiment with some healthy cookies in hopes I could find something that would satisfy the craving, while not dumping me off the wagon. These did great! Chocolate chips, peanut butter, the lovely mouth feel of the oats...not bad at all. I had to put the rest in the freezer to get them out of my sight so I wouldn't eat the entire batch ;)
Healthy peanut butter and banana oat cookies
Ingredients:
3 cups old fashioned oats
2 ripe bananas
1 cup peanut butter (I used Jif reduced fat)
1/2 cup apple sauce (I used one Gogo Squeeze pouch)
1 tsp vanilla
1/2 cup chocolate chips (I used Enjoy Life brand chocolate chunks which are dairy, soy, nut free)

Directions:
Heat oven to 350F. Spray cookie sheets with non-stick spray.
In a stand mixer, mash bananas with peanut butter, apple sauce and vanilla until creamy. Add in oats until combined. Add in chocolate chips.
Use a small cookie scoop to place 1 inch balls of dough on your cookie sheets. Smash down slightly with a fork. 
Bake for 15 minutes, and immediately transfer to a rack or onto a plate to cool.

I was able to make 50 small cookies, at 65 calories each. 
And just try not eating the dough, it was delicious before even being baked!

Tasty Tuesday: Black Bean Burgers

A few weeks back, Billy and I tried a new to us restaurant called Greenhouse Craft Food in Round Rock, TX. It's a locally sourced, seasonal kind of place, and everything we had was delicious! I had the chicken spring rolls for an appetizer, and the black bean burger for my main course. I've actually recreated both of those dishes now! The spring rolls I ate for three days straight and loved every minute of my first attempt at making spring rolls. Now I've tackled my first try at black bean burgers, and think it went over decently. I'll probably be tweaking the recipe each time I make it, but this was a good first shot!
photo via the foodie physician 
Black Bean Burgers
Ingredients for 6 burgers:
2 15oz cans black beans, drained, rinsed and patted dry
1/2 medium bell pepper, cut into pieces
3 garlic cloves, peeled
1/2 cup grated zucchini (squeeze the excess water out after grating)
1/4 cup grated carrot (squeeze the excess water out after grating)
1/2 cup corn
2 egg (for vegan option, use 1 tbsp ground flax seed mixed with 3 tbsp water for each egg)
1 tsp chili powder
1 tbsp onion powder
1 tsp cumin
1 tsp pepper
1 tsp salt
3/4 cup bread crumbs (or oats/brown rice/quinoa)

    Directions:
    Preheat oven to 375F. Line a rimmed baking sheet with foil and coat with non-stick spray.
    Place beans, bell pepper, garlic, zucchini and carrot into a or food processor (or blender, like me, if you don't have a FP. Then swear like a sailor when you realize it would be easier if you did) and blend until it's the consistency of refried beans. Transfer to a large bowl.
    Add spices, breadcrumbs and egg, stir to incorporate. Feel free to adjust the amount of breadcrumbs used to thicken the batter.
    Use a spatula to divide the mixture into 6 parts, then form into patties and place on the baking sheet.
    Bake for 10 minutes, flip (have fun with that!) and bake for an additional 10 minutes.
    Serve with your favorite burger toppings and sides!

      Tasty Thursday: Hawaiian chicken burgers

      Yes, I realize it isn't Tuesday, but I have been enjoying this recipe and wanted to share it with you! Forgive me for changing the days? OK, good. I knew you would rather have a recipe on a random day, than not.

      Since joining the Tone It Up Bikini Series, I have been eating a ton of healthier food. I mean, something like 80% of weight loss comes from your diet, right? Because I was running and biking my little heart out, but eating all sorts of crap that counteracted the exercise and left me at the same weight, or worse, gaining. 

      Well, thankfully there are a ton of recipes from the TIU community for healthy, tasty food. Even the bikini series welcome pack came with a few recipes to try, so of course I had to put my own spin on one. And yes, it's healthy and delicious!
      Via Tone It Up Bikini Series starter pack
      Hawaiian chicken burgers with portabello caps
      Ingredients:
      makes 6
      1lb 97% lean ground chicken breast
      1/2 cup egg whites
      1/2 cup plain panko breadcrumbs
      2 tbsp crushed pineapple
      2 tsp maple syrup
      6 portobello mushroom caps
      6 tbsp soyaki sauce (or teriyake)
      onion powder, garlic powder, crushed red pepper, salt and pepper, or other seasonings to taste

      Instructions:
      • Heat oven to 375F. Line 2 rimmed baking sheets with foil, and spray with non-stick spray. 
      • Combine chicken, egg whites, breadcrumbs, pineapple, syrup and seasonings to taste. It will be very liquidy, but that's cool.
      • Use your hands to form 6 patties and place on the baking sheet. I sort of scooped up a handful and plopped it onto the baking sheet where it kept a patty sort of shape. 
      • Pull out the stem from the portobello caps, place bottom up on baking sheet. Add 1/2 tbsp of soyaki sauce to each cap.
      • Bake chicken patties and mushrooms for 20 minutes, flipping half way through cooking time. 
      • Pull both sheets out of oven and top chicken patties with 1/2 tbsp soyaki sauce each. 
      • Serve warm, with your choice of sides. I ate my chicken patty on a mushroom cap open face style, and had a salad and a side of quinoa with it. I'm sure it would be awesome on a good bun if carbs are a part of your diet.

      Tasty Tuesday: Tex-Mex Spaghetti Squash

      Go check out my girl Cassie's blog to see if she has a yummy recipe for you today!

      So today,  I am giving you a recipe that while new to me, is probably not new to anyone else. I actually got the idea from a recipe that Raven of Don't Quote the Raven posted recently in her healthy living posts. I changed it a tiny bit to accommodate my preferences. You can do the same thing! Make any additions or subtractions that suit your tastes, steal this recipe and make it yours. I am trying to be better about my eating by incorporating more veggies, and making smarter choices. Not easy for a self-professed sugar-holic, but I'm trying, as you can see by this recipe, which I had for two meals yesterday.

      Tex-Mex Spaghetti Squash 
      source
      Ingredients:
      1 large spaghetti squash
      1/2 packet reduced sodium taco season (or make your own!)
      1/2 container of black bean and corn pico de gallo
      1 can no salt added black beans, drained and rinsed
      Add any toppings you may like.  I added a serving of tortilla chips to one of my meals, but avocado, cheese, etc. would be great. 

      Directions:
      • Preheat oven to 375F
      • Split your spaghetti squash in half and remove the seeds. Place cut side down on a cookie sheet that's been coated with cooking spray or foil. Bake for 45 minutes, flip the squash over and bake until flesh is tender, which for me was 15 more minutes. You can also microwave the squash, I think for 7 minutes or so, if you are short on time.
      • Allow squash to cool, then use a fork to scrape the inside of the squash to create spaghetti like strands. Dump into a bowl.
      • Add taco seasoning to squash and mix until thoroughly incorporated. Add black beans and pico. Dish out and enjoy.
      Makes 4 servings at 187 calories per serving without additional toppings.

      Tasty Tuesday: Sweet and spicy roasted lemon chicken

      This is a special edition of Tasty Tuesday, in which I give you some recipes from a seasonal dinner party I hosted. Stop by Cassie's blog to see if she is sharing a recipe, too!
      A few weeks back, I had Stephanie, Casey, their husbands, and Casey's adorable son Wilder over for dinner. We had come up with the idea to have seasonal dinner parties weeks before in a group text, and I was so excited to host the first one. We started with a Winter menu, trying to get ingredients that are readily available during this season. With imported produce, it's not like you can only find certain ingredients in their natural season, but we were trying. This was my first dinner party in my new home, so I was super excited to set my cool table and have people over. I bought flowers for the table, even though I'm allergic. I just made sure to find ones without super pollen-filled stamens.

      As the host, I was in charge of the entree, and a salad, but I also roasted some veggies and heated up a garlic herb flatbread from Costco just because. Stephanie brought brie with blackberry jam wrapped in pastry, and Casey brought apple and blackberry cobblers for dessert and a creamy veggie casserole.

      Right away, I knew I wanted to roast a whole chicken with a citrus twist, since citrus is mainly a winter fruit. Thanks to Pinterest, I found a few recipes and settled on one with a fiery glaze, thinking a tangy, sweet and spicy chicken would hit the spot.

      Citrus Chicken with a honey glaze
      Not the prettiest photo, but it was delicious.
      Ingredients:
      • a 4-5lb whole roasting chicken, giblets and weird innards removed
      • 5 small lemons
      • 1/4 cup olive oil
      • 1 tbsp dried parsley
      • 4 cloves garlic
      • 1 tsp cayenne pepper
      • salt and pepper
      • 1/2 cup honey
      • 2 lemons, halved or quartered if desired
      Directions:
      1. Remove giblets from chicken if present. Rinse chicken and pat dry with paper towels. Place chicken into a gallon size ziploc bag set in a shallow dish. 
      2. Slice two of the lemons and add to the bag. Zest a lemon to get about 2 tsps of peel, set aside. Squeeze remaining lemons to get 1/2 cup plus 2 tbsps of juice for the glaze. 
      3. For the marinade: in a bowl combine 1/2 cup lemon juice, olive oil, parsley, garlic 1/2 tsp cayenne pepper, 1/2 tsp each salt and pepper. Whisk to mix, then pour into the bag over chicken. Seal bag and turn to coat chicken, then pop in the fridge for at least 4 hours. My recipe had called for 8-12 hours, so this would be a good step to do the night before or morning of. Turn the bag whenever you happen to peak in the fridge.
      4. Preheat oven to 375F. Put oven racks to lowest position. Place a small rack, or do what I do and ball up foil, in the bottom of a shallow roasting pan. 
      5. Let chicken stand for 15 minutes at room temperature. Drain chicken and set aside lemon slices, throw out the marinade. 
      6. Place the chicken, breast side up{I think I flipped this when I did it!}, on the rack or foil in the shallow roasting pan. Cover with the lemon slices. If you want, you can place lemon halves or quarters inside chicken cavity, or around the roasting pan. Roast uncovered for 1 hour.
      7. Meanwhile, in a small saucepan, combine honey, 2 tsps lemon zest, 2 tbsps lemon juice, 1/2 tsp cayenne pepper. Bring to a boil over medium heat, stirring occasionally. Remove from heat and set aside.
      8. At the hour mark, pull chicken out of oven, remove the lemons, and brush with honey sauce. return to oven and continue cooking another 30 minutes to 1 hour, or until a thermometer reads 175F and drumsticks move freely in their sockets. Brush with the honey mixture during cooking, and coat with the remaining when the cooking time is done. Let chicken rest 15 minutes before carving. Enjoy!
      The table full of delicious foods
      I can't wait for our Spring seasonal dinner! I get to make the appetizer for that one, so now I have to come up with some tasty recipe ideas that incorporate spring ingredients. Feel free to follow our Seasonal Dinner board on Pinterest to see what recipes we are considering!

      Have you ever hosted a seasonal dinner party? I highly recommend it. Also, I wish I could fit a huge amount of people at my table and had more friends in the area, this would be so much fun with a big group. 

      Tasty Tuesday: French dip sandwiches

      Well, howdy! It's my favorite blogging day, Tasty Tuesday! It's my favorite because I get to share with you a yummy new recipe that is making me quite happy. As usual, head on over and say hello to my girl Cassie, who I constantly encourage to keep posting her own recipes on the day she created.
      I wasn't going to post this recipe until next week, because I have a bunch of delicious recipes to share from the Seasonal Dinner Party I hosted this past Saturday. However, one delicious Instagram photo and many requests for the recipe later, and here I am, writing it out. 

      Like most of my recipes, this one comes with a little story. I, Adrian the happy girl, think that grocery shopping should come with a mandatory free snack before you begin. Raise your hand if you have gone to the store "just for yogurt" and walked out with a cart full of random stuff you have no idea what to do with? And heaven forbid you go to Target, where absolutely everything on the shelves calls your name and wants to just hop in your cart to do a little snuggling with you on the way home. 
      Happens to me All. the. time. 
      And that's what happened yesterday. I went to Target while I was hungry to "pick up cat food" and walked out with a cart load. I was even so determined to just get what I needed that I didn't grab a cart. Once my hands were full, I opted for a hand basket. Once that got heavy and I gave up all hope, I got a cart and loaded up. My local Target is a Super Target, so they have a whole grocery store complete with meat counter and bakery inside, so I like to do a lot of my grocery shopping there. I happened to get the bright idea that I wanted French dip sandwiches for dinner, so of course I made 400 passes of all the food aisles as I remembered what I would need. And this recipe was born.
      Slow Cooker French Dip Sandwiches
      Ingredients:
      3lb beef roast, I used Top Round
      12oz dark beer, I used Guinness, but realized later that Shiner Bock is dark and I had it in my fridge already. I'm not a beer drinker so I went for what I knew was dark.
      2 cups water
      1 tbsp beef flavored Better than Bullion {I had never heard of this until I researched recipes to model this on, you can use bullion cubes, or beef broth and skip the 2 cups water}
      2 tbsp minced garlic
      1 tbsp Worcestershire sauce
      1 tsp garlic powder
      1 tsp onion powder
      ground black pepper to taste, I used 1 tsp
      crusty bread rolls, such as Hoagie rolls
      sliced cheese such as provolone or Swiss

      Directions:
      1. Trim any visible fat from your roast. Place in the crock pot.
      2. Add all of the remaining ingredients to the pot. Cook on low for 8 hours, turning halfway through if you are home. I cooked mine on high for 4.5 hours and it was totally fine.
      3. Split your bread rolls open, spread with butter {or spray with I can't believe it's not butter spray, like I did} and toast in the oven at 350F for 5-10 minutes depending on how toasty you want it. 
      4. Slice meat and pile onto your bread. Top with cheese and pop back in the oven under the broiler to melt everything.
      5. Serve hot, with a side of the cooking juices in a small bowl. That would be the jus and it's fantastic for dipping, thus, French DIP sandwiches.

      And voila, you have a delicious meal that was hardly any work at all. This would be a great recipe for St. Patrick's day, since I used Guinness! 
      A few more tasty photos for you :)

      Tasty Tuesday: Strawberry coffee cake

      As always, giving a shout out to my girl Cassie for creating Tasty Tuesdays :)

      While the family was visiting last week, I wanted to give them a really great breakfast to welcome them to Texas. They flew in late Wednesday, so I knew I could take advantage of a late wake up to put together something yummy. I had no real plans in place, but wanted to bake up a coffee cake of some sort to go with the scrambled eggs and bacon I was making. I searched through a bunch of recipes, and ended up throwing this together with what I had on hand, and it was well received! The cake was moist and slightly sweet, while the strawberries were bursting with flavor and gave a juicy touch to a dish that can often dry out. The topping was crunchy and deliciously buttery. It actually took just a moment to throw together, and baked while I put together the rest of the meal. Definitely bookmark this for your next lazy Saturday morning, or when you want to impress guests at brunch. 
      Sorry for the bad photo! I put this on the table and it was gone quicker than I could snap a nice photo!
      Strawberry Coffee Cake
      Ingredients:
      1 cup all purpose flour
      1/2 cup sugar
      2 tsp baking powder
      1/2 tsp salt
      1/2 cup milk {I had vanilla soy milk on hand, so that's what I used}
      1 egg
      2 tbsp melted butter
      1 1/2 cup chopped strawberries
      Topping
      1/4 cup old fashioned oats
      1/4 cup flour
      1/2 cup sugar
      1/4 cup butter

      Directions:
      1. Preheat oven to 375F.
      2. Mix together flour, sugar, baking powder and salt. 
      3. Add milk, egg, and butter. Beat for 2 minutes. 
      4. Fold in chopped strawberries, then pour into a greased 9 inch pie pan or 8x8 square pan. 
      5. Combine remaining flour, oats, and sugar. Cut in chilled butter until mixture resembles coarse crumbs. Spoon evenly onto the batter.
      6. Bake for 30 minutes, or until a toothpick inserted into center comes out clean.
      7. Serve hot and let everyone pat you on the back for a great recipe!

      Tasty Tuesday: creamy chocolate cake balls

      I like to give Cassie the credit for starting Tasty Tuesday, whether or not she happens to be posting her own recipe. It's just nice blogger etiquette.

      I says balls a lot in this post. If it makes you giggle, welcome to the club, you can be my new bff. If it bothers you, well, come up with another word to replace balls with, like bluffs, or something like that.

      I posted a little teaser of my cake balls on Instagram the other day, and mentioned that I used a new secret ingredient as the binder. You guys, this is so simple, yet ridiculously delicious. 

      I have no doubts that you have had a cake ball, made them yourself, or at least heard of them in the past few years. Starbucks even sells them, so I know I would be hard pressed to find a person unfamiliar. The typical cake ball recipes I have seen and used say to mix in most of a can of store-bought frosting to your crumbled cake. Not bad, and quite delicious. But I really am not a fan of store-bought frosting, and when you are using so much, it makes cake balls a little less appealing to me. I say a little because, let's face it, I will eat pretty much any baked treat, good or bad, and I'll eat it all, too.

      So imagine my delight when I found a suggestion online that did not use frosting at all as the binder for the cake balls. Color me impressed. Who knew you could use a liqueur, half and half, or whipping cream, in addition to the usual frosting option? However, I only had coffee creamer on hand, so I figured I would give it a shot. Um, best decision ever!
      Creamy Dark Chocolate Cake Balls
      Ingredients:
      3 eggs
      1 cup water
      1/3 cup oil
      1 cup Bailey's coffee creamer. I used vanilla brown sugar, but the Toffee Almond Cream sounds great!
      Directions:
      1. Bake the cake according to box instructions using a 13x9 pan. 
      2. Allow to cool, then crumble the cake into a large mixing bowl. I cut the cake into 8 pieces, and rubbed them against each other over the bowl, then used a fork to break up the bigger pieces. I also ate the edges that were not crumbling, hah!
      3. Add 1 cup of creamer {or other liquid of choice} to the crumbs, and use a spoon to mix together. If the mixture seems too dry, add a little more creamer by the tablespoon until it all sticks together well. 
      4. Using a small ice cream, or medium cookie scoop, grab a bit of the mixture and pat it together into a ball shape. Place balls on a waxed paper lined cookie sheet. I had a little trouble with consistent sizing, and my mixture was on the dry side, but I still managed to make 32 balls when all was said and done.
        Freshly rolled cake balls
      5. Chill in the freezer for at least 30 minutes so the cake balls can be handled without breaking apart.
      6. Melt the chocolate in a microwave safe bowl according to package directions. Drop a ball at a time in the chocolate, rolling until it is coated, then set back on the waxed paper lined cookie sheet.
        All 3 stages of balls, uncoated, freshly coated, hardened coating 
      7. Chill in freezer again until the shells are hardened. Transfer to a resealable container and keep in the fridge until ready to eat. 
      Disclaimer: These are really good. Like "eat them all in one weak moment" good. Or "Can't stop thinking about balls" good. I suggest having a destination for the finished product before you set to making these, as you won't want to part with them unless you have a very good reason. Like making your significant other worship you, impressing the heck out of your friends, being very popular at a bake sale, or to console your PMSing sister, as just a few very worthwhile options.

      Happy baking!

      Tasty Tuesday: Ranch chicken and veggies

      It has been absolute ages since I last posted a recipe for Tasty Tuesdays, and since I have a few minutes before it's technically Wednesday, I needed to get this in. It was that good. Cassie hasn't been posting her Tasty Tuesdays either, but maybe this will be the push she needs to get back to telling us about her own kitchen adventures!

      Ashley, over at Our Own Ordinary is my new Instagram buddy, thanks to randomly commenting on a photo I took of a sign that Wizard's Academy out near Driftwood, Texas. She actually got married there recently, and wanted to let me know. Fast forward to today, when I finally clicked her blog link in her IG profile, and there it was, the inspiration for my own dinner, her recipe for rosemary roasted chicken and veggies. Y'all, it looks delicious in it's own right, and had me thinking about how I could get crafty with what I had on hand.

      Then I went to my new favorite place ever, the HEB grocery store, and spent a wonderful hour piling my cart high with all sorts of amazing yumminess. If you are not from Texas, you have no idea what you are missing. In short, HEB is a mega grocery store chain native to Texas, and has everything from your normal groceries, to electronics, to garden stuff. It's ridiculously amazing. I mean, what other grocery store lets you sample cheese and crackers, and do wine tastings in the store?! I absolutely got all of my ingredients from my local HEB, all fresh and awesome.
      I digress. Back to the recipe! Chicken thighs make this juicy, tender, and so flavorful. You can also use chicken breast, but I think thighs are more delicious, and cheaper too! The ranch seasoning is such an easy addition that gives a great pop of flavor with hardly any work. The veggies fill you up and make you feel healthy. I swear, this is the perfect weeknight recipe to throw together, with such a satisfying result.

      Happy Girl Ranch Chicken and Veggies

      Ingredients:
      • 1lb boneless, skinless chicken thigh fillets, trimmed of fat
      • 1 packet Ranch seasoning mix
      • 6 baby potatoes {or 2 russets, a handful of red, any potato you like, etc.}
      • 1 medium zucchini, chopped into chunks
      • 1 red bell pepper, chopped into chunks
      • 1 cup sliced baby portobella mushrooms {I felt like adding some fun{gi} to the mix, you can omit if you don't like 'em}
      • 2 tbsp extra virgin olive oil
      Directions:
      1. Preheat oven to 425F. Heat a large skillet to medium-high heat, and coat with non-stick spray or 1 tbsp on evoo.
      2. Spray a casserole dish with cooking spray, and throw in your chopped veggies. Sprinkle half the Ranch packet and the remaining evoo over the veggies, then toss to coat. Stick in the oven to roast while you work with the chicken.
      3. Sprinkle the rest of the ranch seasoning on the front and back of your chicken thighs. Place in the heated skillet and brown both sides, about 5 minutes. 
      4. Remove the veggies from the oven and place your browned chicken on top, then return to the oven and bake for 20 minutes, or until your chicken is cooked through and veggies are tender. 
      5. Serve with a salad, another veg, or your favorite side dish. It will be delicious, and you will pat yourself on the back for a job well done.
      My fitness pal says it's about 312 calories per serving, and serves 4 with the way I made it. Not too shabby! 
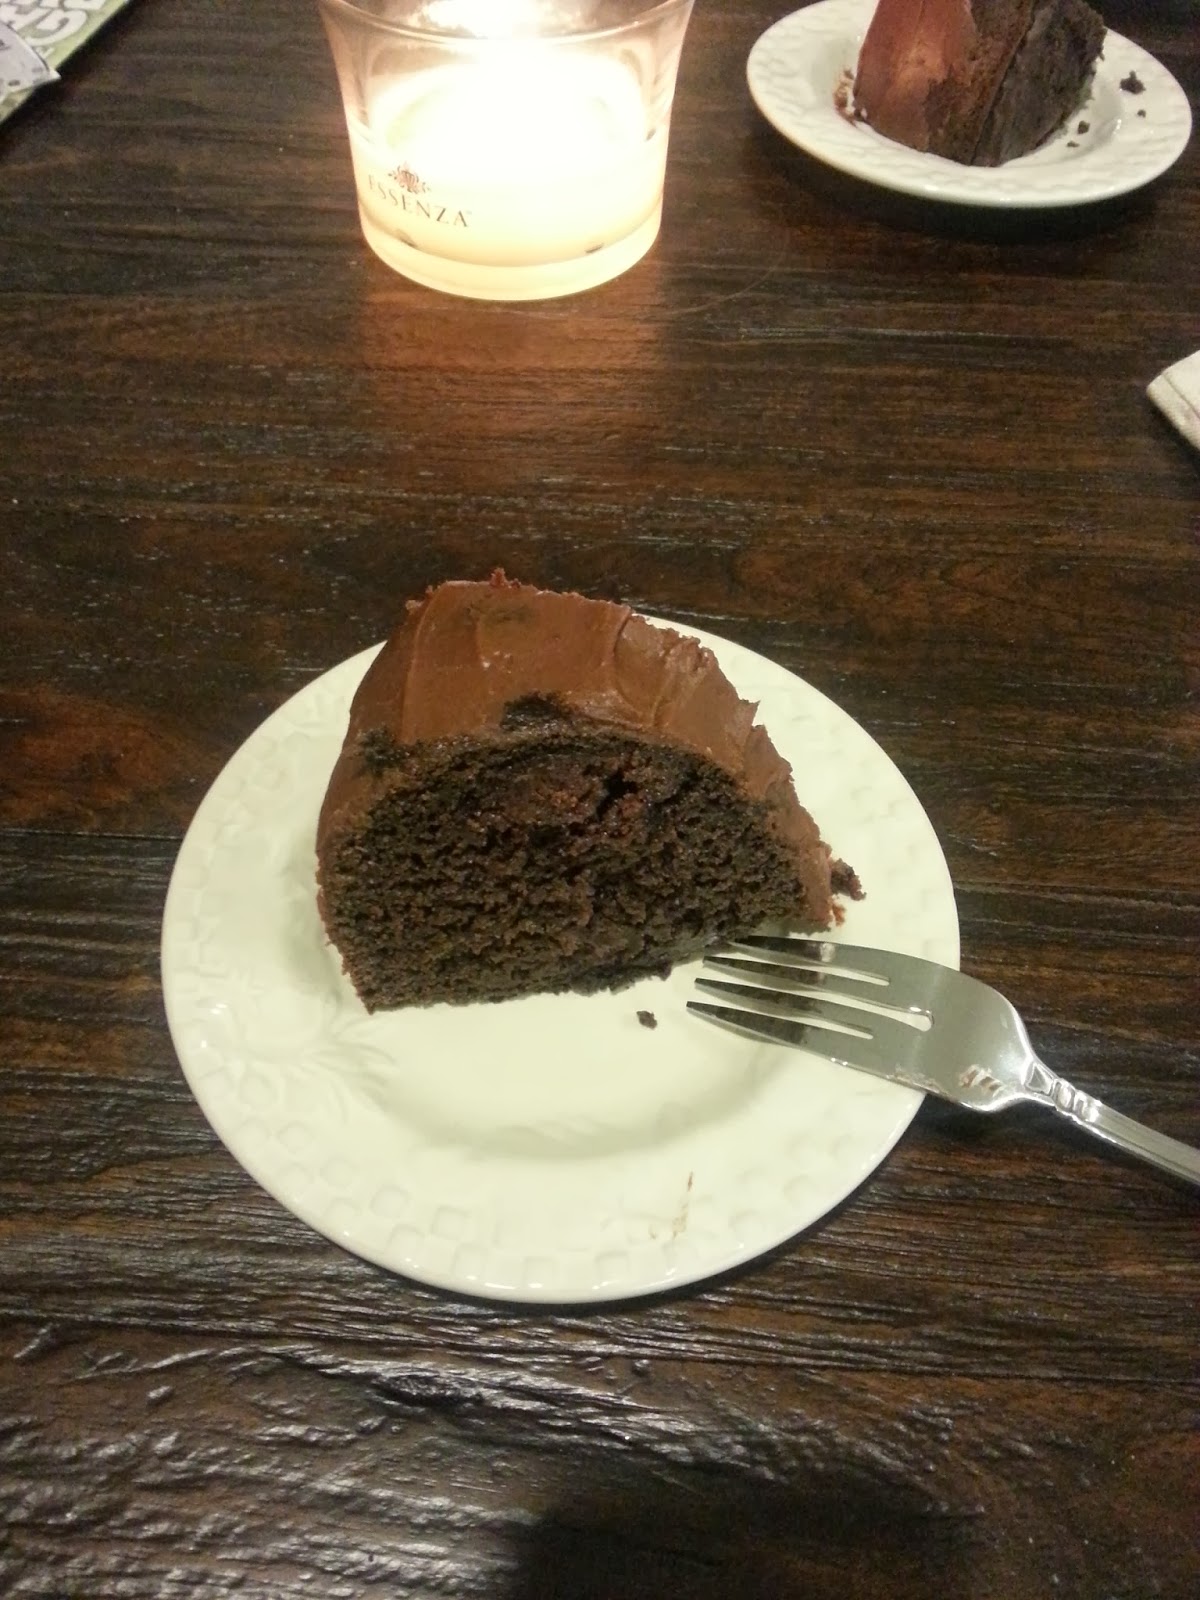
      I most certainly followed up this healthier dinner with a big slice of the chocolate bundt cake I made earlier! It was amazing. I have a similar recipe that you can use, here!

      tasty Tuesday: Mahi Mahi tacos

      Woo hoo it's the best day of the week, Tasty Tuesday! As always, go show my girl Cassie some love and see what she's got cooking. 
      Now, I have to admit something, and it shames me to do so. I haven't done much real cooking lately. Well, I have made my breakfast tacos and smoothies a few times, but that's just scrambled eggs and sauteed veggies scooped up in a tortilla, or frozen fruit whirled together in a blender. Not much effort. As for dinners and baking? Hmmm, I've been lazy. I blame all of the books I have been obsessed with reading, the TV shows and movies I have to watch to stay current, and the running and biking I have to do to train for a half marathon. Oh, and working at the salon, doing hair and makeup for weddings, and taking a ton of babysitting jobs too. Cooking hasn't really been on my mind. I did however make these awesome tacos for the kids I babysat for last week, and they loved them! I actually can't believe I haven't shared this super easy peasy recipe with you yet, I was inspired by Rubio's habanero mango mahi mahi tacos, and I've been making it every other week or so because I love it so much. 

      Mahi Mahi tacos
      serves 4, or two really hungry people
      Ingredients
      1 pkg of 3 frozen Mahi Mahi fillets, Trader Joe's brand are awesome
      1 tbsp olive oil
      1 tbsp Mrs. Dash Fiesta Lime seasoning
      2 tbsp lime juice
      1/2 cup mango salsa, I used the TJ's fresh fire roasted papaya mango salsa and it's divine
      8 small corn tortillas, I like the TJ's De Mi Abuela corn and wheat tortillas
      1/2 cup slaw type shredded veggies, I like TJ's broccoli slaw
      1 avocado, sliced
      optional add ons: black beans, cheese, sour cream, rice, etc.

      Directions: 
      Heat oven to 375F. Line a rimmed baking dish with foil, and coat with non-stick spray. Remove Mahi fillets from package and place in the baking dish. Drizzle olive oil over the fillets, then season with Mrs. Dash on both side, and baste with lime juice. Bake for 10-12 minutes or until fish is opaque and flakes easily. Allow to cool, then use your fork to separate the fish into large flaked pieces. Heat your tortillas according to package directions. Top each tortilla with a bit of fish, salsa, slaw, avocado, and any other toppings you like. I keep it simple with the first 4. Dig in and be amazed at how this easy to put together meal tastes. 

      Seriously, Mahi Mahi and mango salsa were born to go together. It's a ridiculous combination that brings out the spicy sweetness of the salsa, and the mild buttery-ness of the fish. Perfection. A good corn tortilla doesn't hurt, and the slaw gives a much needed crunch to the rest of the soft taco, while creamy avocado is just the cherry on top for this special treat. Give it a try next time you are in a crunch and have only a short while to get a delicious dinner ready. I especially love that the fish cooks from frozen so quickly! Being able to cook frozen meat beats the heck out of defrosting something. 

      Tasty Tuesday: Breakfast options

      Hello and welcome to another edition of Tasty Tuesdays! 
      I am joining my friend Cassie in sharing some of my favorite recipes. I am just about ready to create a link up for her already, it's just so much fun to have a day to share some of the yummy things I've made lately ;)
      Today I wanted to share a few breakfast recipes that are my go-to options for busy and leisurely mornings alike. Like many of my recipes, you can add to and alter these recipes to fit your preferences, but this combination seems to do it for me more often than not.

      Breakfast tacos 
      Because really, who doesn't like tacos? This is such a satiating and filling recipe, with great protein, carbs and good fats, so you won't feel hungry for hours.
      Ingredients:
      2 small tortillas, my favorites are Trader Joe's corn and flour tortillas
      1 egg white, 1 whole egg
      1/4 cup chopped sweet potato
      1/4 cup chopped zucchini
      1/4 cup chopped red bell pepper
      2-4 chopped cherry tomatoes
      1/2 an avocado
      a sprinkle of crumbled goat cheese
      cooking spray, I used Trader Joe's coconut oil cooking spray, which was fantastic!
      Directions:
      Heat a small skillet to medium heat. Coat with cooking spray, then add your chopped sweet potato and zucchini, stirring occasionally for 2 minutes. Add your red bell pepper and cook 1 minute. Add you tomato. In a small bowl, whisk together your egg white and whole egg, then add to the skillet, using a spatula to scramble everything together until done. Place egg and veggie mixture in a bowl, and top with goat cheese and chopped avocado. Heat your tortillas according to package, and then fill with egg mixture to make tacos.  

      Pb&j milkshake
      I woke up craving a peanut butter and jelly sandwich recently, and was sad to discover that I do not have a naturally sweetened jam on hand, so I made this healthy milkshake to beat my craving without giving in to processed sugar.
      Ingredients:
      1 banana, can be fresh or frozen
      1 cup sliced strawberries, fresh or frozen
      2 tbsp PB2 powdered peanut butter {you may also use regular peanut butter, but know the calories will be higher}
      1 cup milk of your choice
      1 scoop protein powder,  {I used chocolate, but strawberry or peanut butter flavors would be perfect}
      1 tbsp chia seeds
      1 tbsp ground flaxseed
      1 cup ice if using fresh fruit
      Directions: 
      Add all of your ingredients to a blender, blending until smooth and frothy. Pour into a big glass and enjoy a quick breakfast! 

      Tasty Tuesday: Cheesy chicken chimichangas

      Happy Tasty Tuesday! My girl Cassie started this little recipe day way back when, and even without a link up I just love participating so I can share my newest recipes with you. 
      I shared with you all last week that I am a fully converted lover of spice and Mexican food, so it's no surprise that when I happened upon a chimichanga recipe with cheesy in the title, I had to make it. Like last week's pork enchiladas recipe, I shortened the active cooking time by using my crock pot and fudging the ingredients to suit my tastes and desires. 
      Ingredients:
      1 lb chicken, I used breast tenders
      1/2 jar salsa verde
      2 tbsp taco seasoning
      8oz shredded pepper jack cheese
      8oz package neufchatel cream cheese
      8 flour tortillas
      Directions:
      1. place chicken in a crock pot and cover with salsa verde. Cook on high for 4 hours, or low for 8 hours. 
      2. preheat oven to 350F. Line a pan with foil and spray with non-stick spray.
      3. Shred chicken, add in taco seasoning, cream cheese and pepper jack cheese.
      4. divide chicken mixture between the tortillas, fold the sides in and place seam down on baking pan. Spray with cooking spray, and bake for 15 minutes. Turn oven to broil, and cook 3 more minutes to get the chimichangas good and browned.
      5. serve with your favorite fixings, like cheddar cheese, sour cream, and green onions! 


      Tasty Tuesday: Pork and plantain enchiladas

      You guys, the world is so broken. I was shocked to hear about the bombings that occurred during the Boston Marathon yesterday. Who would set off bombs during a race?! I'm not sure what sort of message was sent by whomever was twisted enough to put this together. I think things like this are atrocious acts of violence and evil, and ultimately fail, because while it may cause havoc, destruction and even death, it actually brings people together in support and solidarity. My heart goes out to all of the people affected by this tragedy, and I hope the investigation brings the culprits to light, and they are justly punished to the fullest extent of the law.
      Thank you Mr. Rogers, for reminding us that there still very good people in our broken world.
      ***
      Today for Tasty Tuesday I am sharing a yummy enchilada recipe that made me very happy when I made it last week. Go check out Cassie's blog to see what sort of yumminess she is sharing with you!
      Once upon a time, I was a girl who couldn't tolerate spice. 
      The spiciest my palate could appreciate was cinnamon. Real spicy, ya know. It wasn't until I turned 21 that I discovered I liked salsa, and a whole world of foods were now available to me and I discovered the delicious flavors they provide, and I've never looked back. Mexican food is probably my favorite food genre, now that I enjoy a little spice.

      Om nom nom a little spice never tasted so good! The original recipe was super long and complicated, taking a bunch of different steps to make sauces from scratch and what not, and I just can't tolerate a drawn out recipe that has so many easy substitutions available. So I Happy Girl'd the recipe to fit my lack of desire to be cooking forever and washing dishes into eternity by using my crock pot and jarred sauces. I love when I can do that.  

      Pork and plantain enchiladas, my way
      Ingredients:
      1lb pork loin roast, trimmed of visible fat
      1/2 tsp ground cumin
      1/2 tsp oregano
      1/2 tsp ground red pepper {cayenne}
      1/4 tsp salt
      1 jar salsa verde, I used Trader Joe's brand
      1/2 jar spicy black bean dip, also TJ's brand
      2 plantains, peeled and coarsely chopped {original recipe called for soft black plantains, but I happened to have the green harder ones on hand, so I used those}
      1/2 tsp ground red pepper
      1 tbsp brown sugar
      1 tbsp coconut oil
      10 medium corn tortillas
      1 cup shredded Mexican style cheese
      Directions:
      1. Mix together cumin, oregano, 1/2 tsp red pepper and salt. Rub evenly over the pork roast, then place in a crock pot and cook on high for 4 hours, or on low for 8 hours. Once pork is cooked, shred with two forks and allow to soak up cooking juices. 
      2. Mix together 1/2 tsp red pepper and brown sugar. Coarsely chop your plantains, place in the bowl with your spices and toss to coat. Heat a large skillet over medium high heat, melt your coconut oil, then saute the plantains for about 3 minutes, or until browned and softened. 
      3. Preheat oven to 350F. Use about half of your salsa verde to cover the bottom of a sprayed 9x13 pan. Heat up your tortillas, and get ready to put everything together. 
      4. Spread about a tbsp of black bean dip down the center of a tortilla, place a dollop of shredded pork, a spoonful of plantains over the bean dip, and top with cheese. Place seam side down in your pan, and repeat with the rest of the tortillas. 
      5. Pour the rest of the salsa verde over the enchiladas, and top with the rest of the cheese. Bake at 350 for 25 minutes, or until cheese is melted and filling is heated through. 

      Now enjoy a little spice and a super tasty dinner!


      Tasty Tuesday: 4.9.13 pizza pull apart bread

      Happy tasty Tuesday! 
      Cassie shared a wonderful recipe over at her darling blog today, so make sure you visit her to check it out!
      Today I am stepping off of my beloved chocolate peanut butter dessert train and giving you something savory and delicious! The photo from the post basically gives you the step by step, so grab your ingredients, which can vary according to your personal tastes, and put together a delicious dinner! I included my own version of the recipe below. So without further ado, 
      Pizza pull apart bread 
      via www.joyzz.com
      Via www.joyzz.com 
      I made it using different ingredients, so I am sharing my version here. I sort of just used ingredients without measuring, so use whatever you want in any measurement, or check the original post for better measurements.
      Ingredients:
      1 1/2 cans refrigerated biscuits
      1lb sweet Italian chicken sausage, casing removed and cooked
      marinara sauce
      soft goat cheese
      shredded white cheddar cheese
      1 stick butter, melted
      1 tbsp Italian seasoning
      1 tsp minced garlic
      Directions:
      1. Preheat oven to 350F. Grease a bundt pan with cooking spray. 
      2. Separate the biscuits, and use a knife to make a slit in one of the sides. 
      3. Carefully make a pocket inside the biscuit. 
      4. Spread a dab of goat cheese in the bottom of the pocket, spoon  in some sausage, pour in a little marinara, and top with shredded cheese. 
      5. Pinch the sides of the pocket together, sealing completely. 
      6. Repeat steps 2-5 until all of the biscuits are now pizza pockets. 
      7. Mix the Italian seasoning and garlic into the butter, then dip each pizza pocket, and place in the bundt pan vertically. Pour remaining butter mixture over pockets.
      8. Bake for 30 minutes, or until golden brown and no longer doughy between each pocket. I found my pockets turned golden brown on the outer edge, but the sides that were mushed together stayed a little doughy, which was fine by me.
      9. Allow pan to cool for 5 minutes, then carefully place a plate on top of the pan, and invert, removing the pull apart bread from the pan. 
      10. Pull apart and enjoy a super yummy dinner!
      Older Post ►
       

      Copyright 2011 b happy girl is proudly powered by blogger.com