Showing posts with label cake. Show all posts

Tasty Tuesday: creamy chocolate cake balls

I like to give Cassie the credit for starting Tasty Tuesday, whether or not she happens to be posting her own recipe. It's just nice blogger etiquette.

I says balls a lot in this post. If it makes you giggle, welcome to the club, you can be my new bff. If it bothers you, well, come up with another word to replace balls with, like bluffs, or something like that.

I posted a little teaser of my cake balls on Instagram the other day, and mentioned that I used a new secret ingredient as the binder. You guys, this is so simple, yet ridiculously delicious. 

I have no doubts that you have had a cake ball, made them yourself, or at least heard of them in the past few years. Starbucks even sells them, so I know I would be hard pressed to find a person unfamiliar. The typical cake ball recipes I have seen and used say to mix in most of a can of store-bought frosting to your crumbled cake. Not bad, and quite delicious. But I really am not a fan of store-bought frosting, and when you are using so much, it makes cake balls a little less appealing to me. I say a little because, let's face it, I will eat pretty much any baked treat, good or bad, and I'll eat it all, too.

So imagine my delight when I found a suggestion online that did not use frosting at all as the binder for the cake balls. Color me impressed. Who knew you could use a liqueur, half and half, or whipping cream, in addition to the usual frosting option? However, I only had coffee creamer on hand, so I figured I would give it a shot. Um, best decision ever!
Creamy Dark Chocolate Cake Balls
Ingredients:
3 eggs
1 cup water
1/3 cup oil
1 cup Bailey's coffee creamer. I used vanilla brown sugar, but the Toffee Almond Cream sounds great!
Directions:
  1. Bake the cake according to box instructions using a 13x9 pan. 
  2. Allow to cool, then crumble the cake into a large mixing bowl. I cut the cake into 8 pieces, and rubbed them against each other over the bowl, then used a fork to break up the bigger pieces. I also ate the edges that were not crumbling, hah!
  3. Add 1 cup of creamer {or other liquid of choice} to the crumbs, and use a spoon to mix together. If the mixture seems too dry, add a little more creamer by the tablespoon until it all sticks together well. 
  4. Using a small ice cream, or medium cookie scoop, grab a bit of the mixture and pat it together into a ball shape. Place balls on a waxed paper lined cookie sheet. I had a little trouble with consistent sizing, and my mixture was on the dry side, but I still managed to make 32 balls when all was said and done.
    Freshly rolled cake balls
  5. Chill in the freezer for at least 30 minutes so the cake balls can be handled without breaking apart.
  6. Melt the chocolate in a microwave safe bowl according to package directions. Drop a ball at a time in the chocolate, rolling until it is coated, then set back on the waxed paper lined cookie sheet.
    All 3 stages of balls, uncoated, freshly coated, hardened coating 
  7. Chill in freezer again until the shells are hardened. Transfer to a resealable container and keep in the fridge until ready to eat. 
Disclaimer: These are really good. Like "eat them all in one weak moment" good. Or "Can't stop thinking about balls" good. I suggest having a destination for the finished product before you set to making these, as you won't want to part with them unless you have a very good reason. Like making your significant other worship you, impressing the heck out of your friends, being very popular at a bake sale, or to console your PMSing sister, as just a few very worthwhile options.

Happy baking!
All good things have layers

I have no idea if my title sentiment is actually true... 
but Shrek says people have layers, most people need layers to make their hair bouncy, and the cake I made today has layers, 
so I am going with it. 

Speaking of cake, who likes it? 
This girl right here, and hopefully most of you, because I really don't like when my friends hate cake. If you can't tell, I have cake on the brain. 
I made a really pretty one today, and I can't wait for Billy to get home so I can cut into it and see if it's as tasty as it is awesome. 
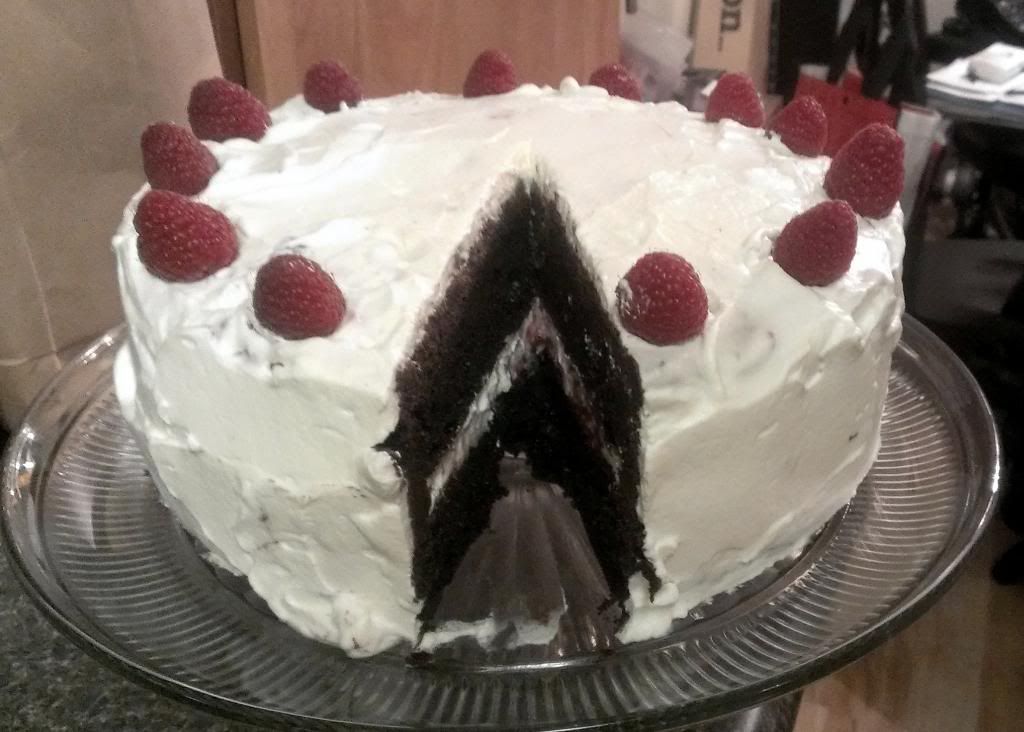
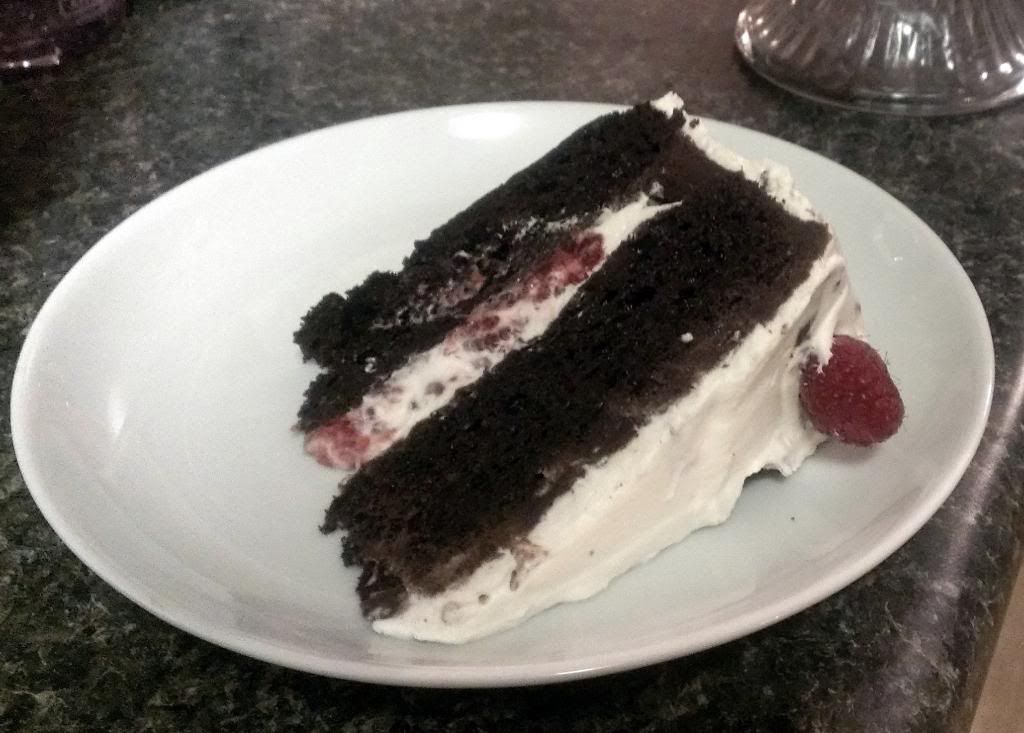
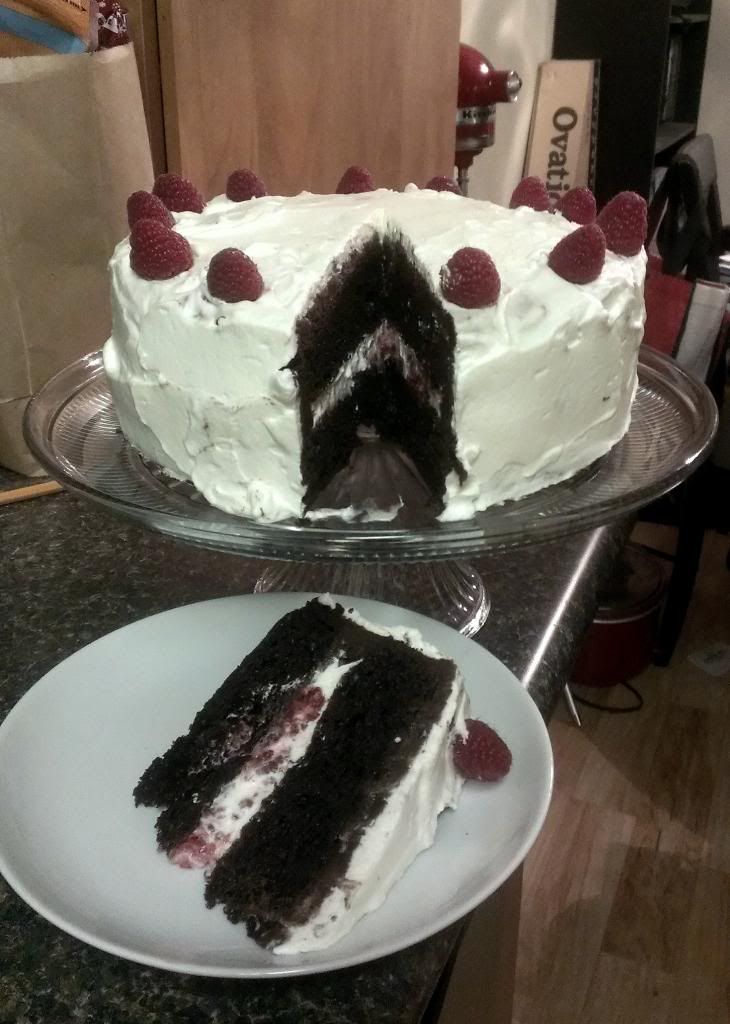
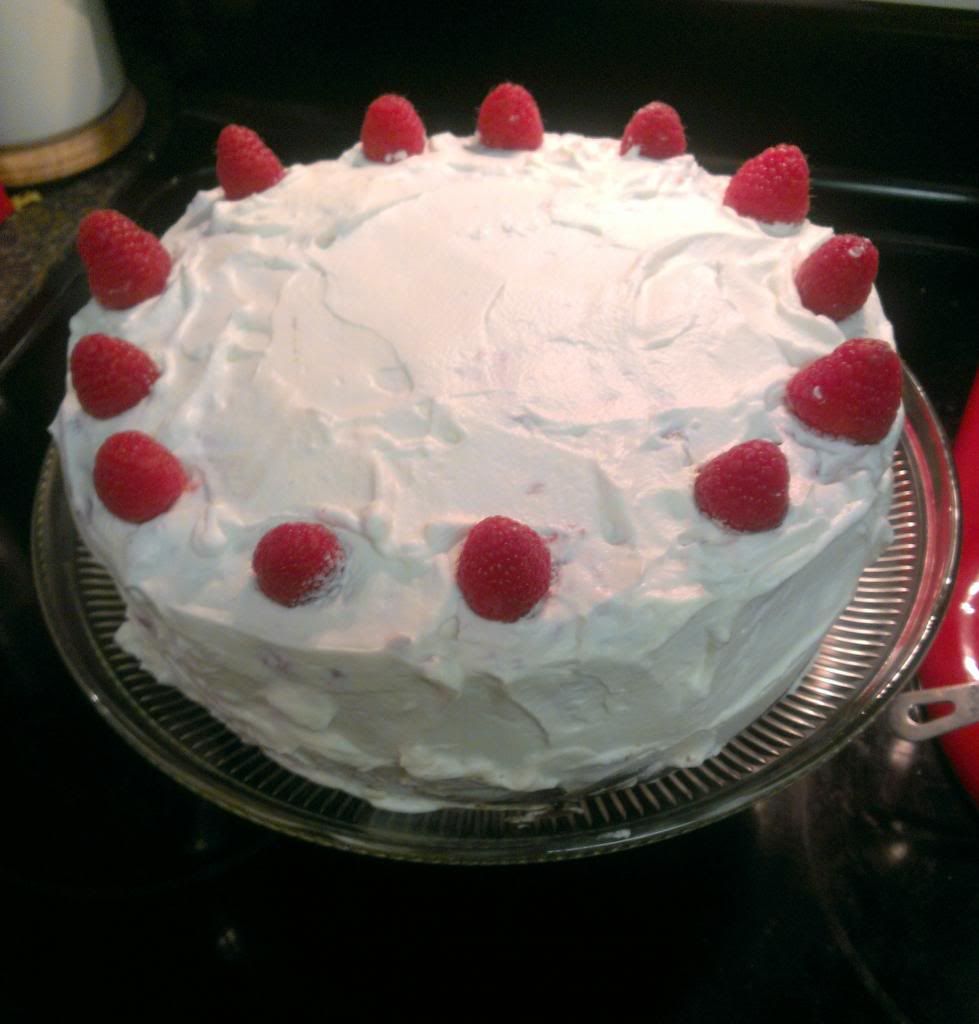
Ain't she a beaut? That piece of confectionery goodness is a chocolate cake with each of the two layers thickly iced in chocolate ganache, then covered in homemade crushed raspberry whipped cream. Oh yes, delicious. What's that you say? I just mentioned I was waiting until Billy got home? Yeah, that didn't happen. Dude gets off work late and won't be home until 9:30pm. Much too late to wait for cake.
I found a few recipes online and mushed them together to create this tasty cake, I know you are probably interested in the recipes I used, and I don't like to disappoint.

Raspberry Whipped Cream Truffle cake
adapted from this recipe

For cake: {makes a sturdy, dense and moist cake}
1 box Duncan Hines chocolate cake mix
1 small box chocolate pudding 
4 egg whites
1 cup Greek yogurt
1/2 cup water
1/3 cup oil

For chocolate ganache:
12 ounces chocolate chips or chopped chocolate
1 cup whipping cream
1/4 cup butter
2 tbsp sugar {I don't remember if I actually used it, but it won't hurt either way}
1 tsp vanilla

For whipped cream:
1 3/4 cup plus 2 tbsp whipping cream
2 tbsp sugar
1 tsp vanilla
2 cups fresh raspberries

Instructions:
For cake: Preheat oven to 350F. Use non-stick spray to coat two 8 inch cake pans, and line the bottoms with waxed paper. Incorporate all ingredients one by one using a mixer on low speed. Once the ingredients are mixed, mix on medium speed for 2 minutes. Pour the batter into the cake pans and even out. The batter will be thick and pudding like. Bake for 30 minutes. Remove from oven onto wire racks to cool for 20 minutes. Turn the cakes out onto the racks and allow to fully cool. I stuck mine in the fridge for two hours to make sure they were fully cool and easy to work with. 
For ganache: Combine whipping cream, sugar, butter and vanilla in a sauce pan over medium heat until the butter has melted and the sugar is dissolved. Turn heat to low and add chocolate, stirring until melted and smooth. Remove from heat and set aside for an hour or two until fully cool and thickened. 
For crushed raspberry whipped cream: Place a metal mixing bow and wire whisk attachment in the freezer or fridge for 10 minutes to get really cool. Combine whipping cream, sugar and vanilla in your now cold bowl, and whip on high speed with your cold whisk until stiff peaks form. Fold in about half your raspberries, then give them a good smashing to crush and color your cream. 

Assembly:
Once the cake is cool, place one layer upside down on a cake plate with waxed paper strips under the edges to catch any messes. Apply about a cup of ganache to the top of the cake layer, and gently smooth across and down the sides of the cake, covering completely. Apply about 1 cup of whipped cream to the top of the layer, and smooth to edges. Place your second layer right side up on top of the whipped cream and press down gently to adhere. Spread ganache over the top of this layer, then down the sides, adding more ganache as you go to completely cover the cake. Drop a dollop of whipped cream on top of the now ganache covered cake and gently spread to the edges and down the sides, adding more whipped cream as you go until the cake is fully covered. Dot raspberries around the top edge of your now twice covered, delicious, cake.

If you want to get ambitious, you can cut each cake layer in half horizontally to make four layers. I just wanted my cake, man, so I kept it simple and just used the two. 

I managed to wait a few hours after my cake was completed to cut into it, but I think you would be just fine digging right in. Because it is worth it. And of course, enjoy!
Billy's reaction: "Eh, I'm a chocolate purist. Mixing fruit with chocolate doesn't work for me. Maybe you should invite people over tomorrow and feed them cake." {inferring that he doesn't want me to have to eat the entire cake myself} HAH! He's a riot that one.
Older Post ►
 

Copyright 2011 b happy girl is proudly powered by blogger.com